Gladiator Hoops / Wall Mounted Hoop
Wall Mount Fixed Height Hoop
Ships free to your door on a pallet via LTL freight — $0 shipping at checkout, no code needed. Curbside delivery with liftgate.
Add a Custom Print Wall Pad to this hoop and take 10% off both items. No code to enter - it applies in your cart.

Every pad is printed to your artwork, so you choose the design on the pad page. Add this hoop to your cart first and the 10% lands automatically once both are in.
Description
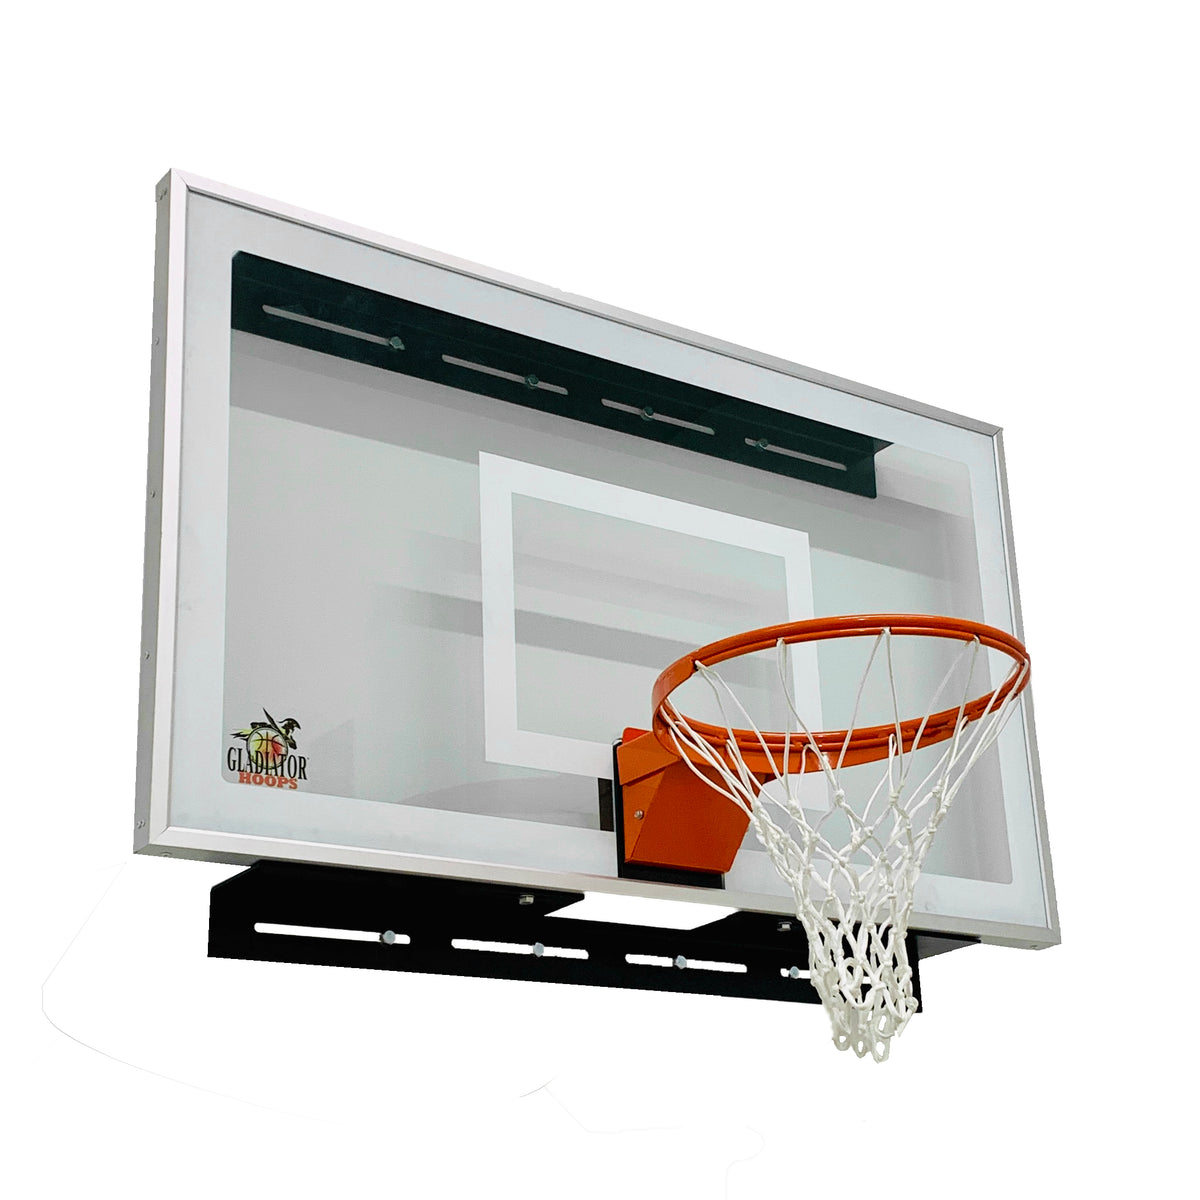
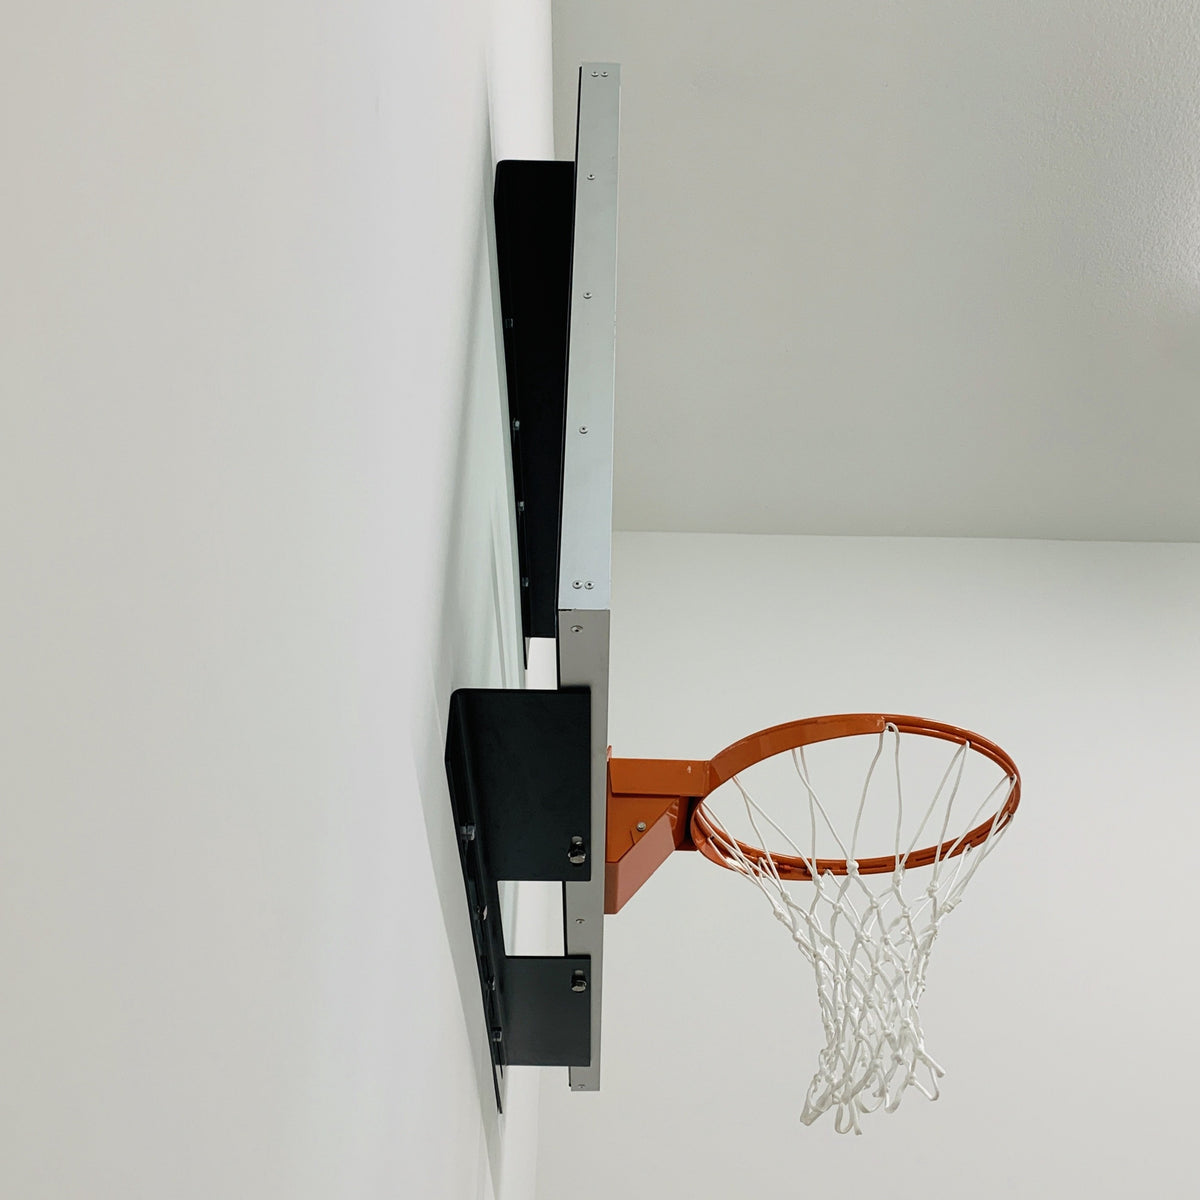
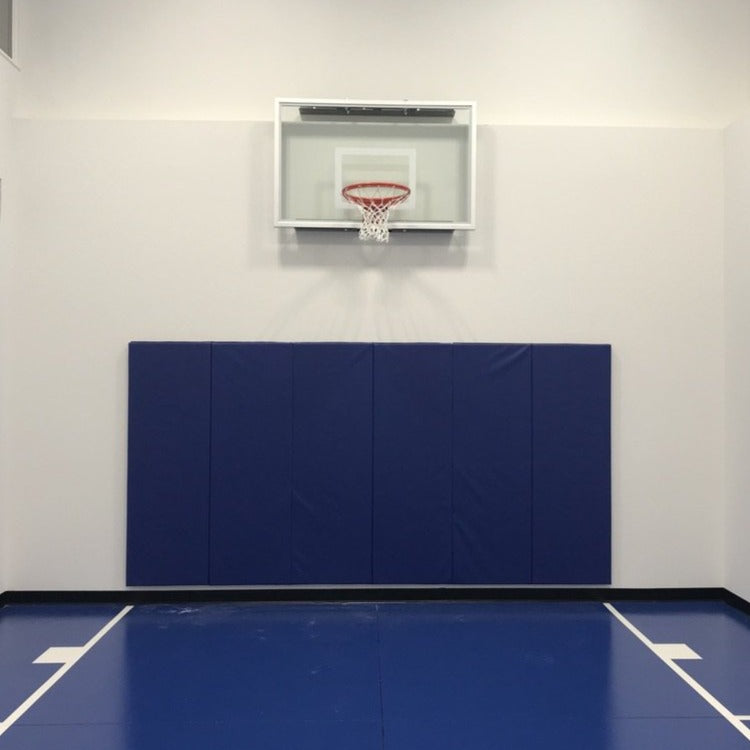
Regulation height, maximum court. The fixed-height wall mount puts a rim just 6 inches off the wall — the smallest footprint in the lineup, built with the same commercial-grade steel as our adjustable systems.
- 6" fixed overhang — rim set at your install height
- 3/8" tempered-glass clear-view backboard — 54", 60", or 72"
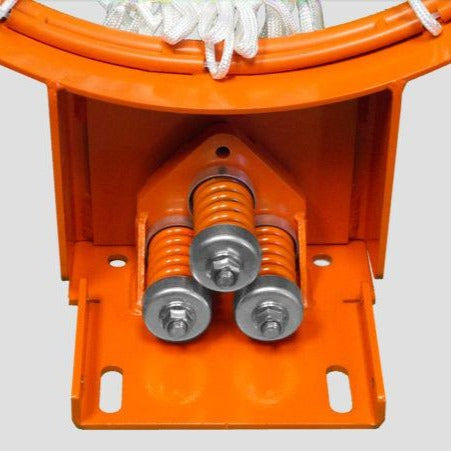
- Triple-spring heavy-duty side-flex rim with concealed netting
Full description & specs
Regulation height, maximum court. The fixed-height wall mount puts a rim just 6 inches off the wall — the smallest footprint in the lineup, built with the same commercial-grade steel as our adjustable systems.
Large steel plates secure the glass at top and bottom for a clean, clear-view face, and the fixed brackets make installation straightforward on any properly reinforced wall.
- 6" fixed overhang — rim set at your install height
- 3/8" tempered-glass clear-view backboard — 54", 60", or 72"
- Triple-spring heavy-duty side-flex rim with concealed netting
- 5-gauge galvanized steel, black powder-coat finish
- 18-8 stainless steel hardware
- Straightforward installation on reinforced walls
Shipping & delivery — free
Shipping is free on this product. It ships palletized LTL freight to your door with liftgate delivery, and you pay $0 shipping at checkout — no code needed.
Hoops and flooring ship palletized freight. We confirm your delivery details after checkout and coordinate a delivery window with you. Accessories ship standard ground.
Installation
Every wall-mount system anchors to structural framing or masonry. Use the wall compatibility checker below to verify your wall before ordering — or send us photos and we will confirm it for you.
By the numbers
Built to stay put. Built to last.
The specs that matter on a fixed-height wall mount — the footprint, the glass, and the parts that keep it true.
The backboard sits just 6 inches off the wall — the smallest footprint of any Gladiator wall mount.
Tight to the wall, so side hoops stay clear of the main court's sideline run-off and never crowd the main hoop.
Mount the rim at regulation 10 feet — or any fixed height your program needs — and it never moves.
Clear-view 3/8-inch tempered glass with an aluminum edge frame — in 54", 60", and 72" sizes.
Large steel plates secure the glass above and below. No crank, no linkage, nothing to adjust or maintain.
Heavy-duty triple-spring flex rim deflects under load and snaps back true — protecting the glass and your wrists.
Safety rim and net connector with Meridian rope anti-tear rim netting keeps the net locked on through heavy play.
Heavy 5-gauge galvanized steel finished in black powder-coat — the same commercial-grade build as our adjustable systems.
Every included bolt, nut, and washer is stainless steel.
The 6-inch overhang
Six inches off the wall. All court.
The fixed-height mount holds the backboard just 6 inches from the wall — the smallest footprint of any Gladiator wall mount. That's what makes it the go-to side hoop next to a main court, and the space-saver for smaller indoor courts.
Two steel wall plates hold the backboard just 6 inches off the wall. No arm, no linkage, nothing reaching into the room - the whole assembly stays within half a foot of the wall it hangs on.
- Smallest footprint of any Gladiator wall mount
- Rim set once at install - usually regulation 10 ft
- 54", 60", or 72" tempered-glass backboard
In a gym, side hoops live on the long sideline walls for cross-court games and shooting stations. A 6-inch fixed overhang keeps every one of them flat against the wall, so the main court's sideline run-off stays clear and nothing hangs over the out-of-bounds lane.
Even a tight 20 x 22 ft room fits a full 12-ft lane and the top of the high-school three-point arc. With the board only 6 inches off the wall, the free-throw line lands 15 ft 6 in. out and the top of the arc at 21 ft 6 in. - inside a 22 ft room with 6 inches to spare. The corners get cut off by the side walls, but the shot from the top of the key is a real three.
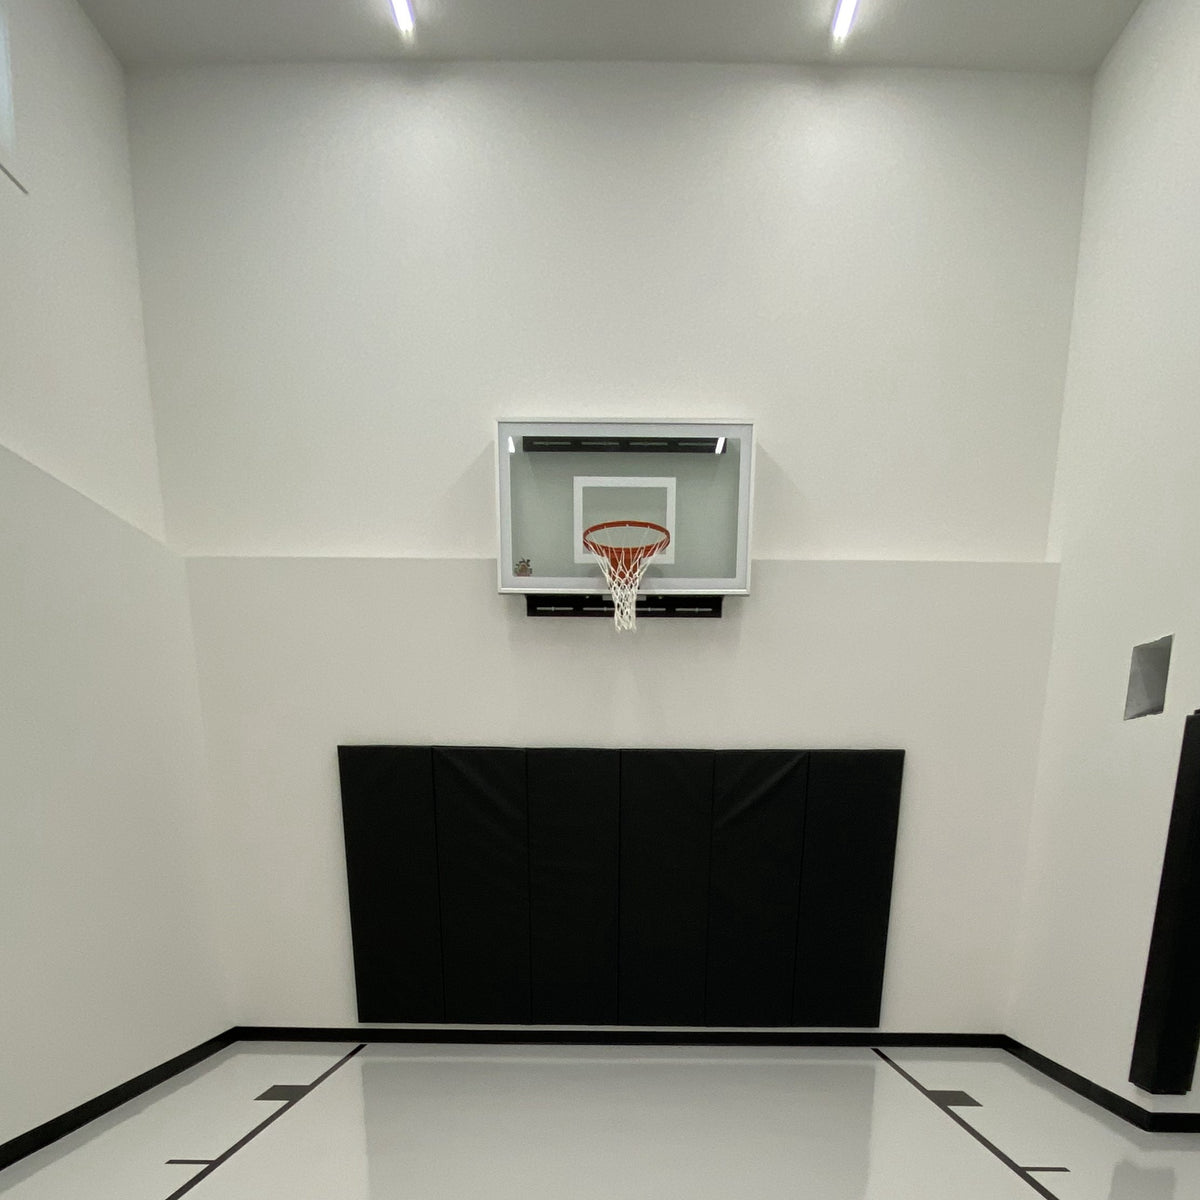
Players finishing at the rim end up close to the wall on any 6-inch install. Pair it with wall padding on that wall.
Where it fits
Built for the walls the main hoop can't use.
Side & cross-court hoops
Line the sideline walls of a full court with six of them and run three cross-court games at once, without the boards crowding the main court.
Small indoor courts
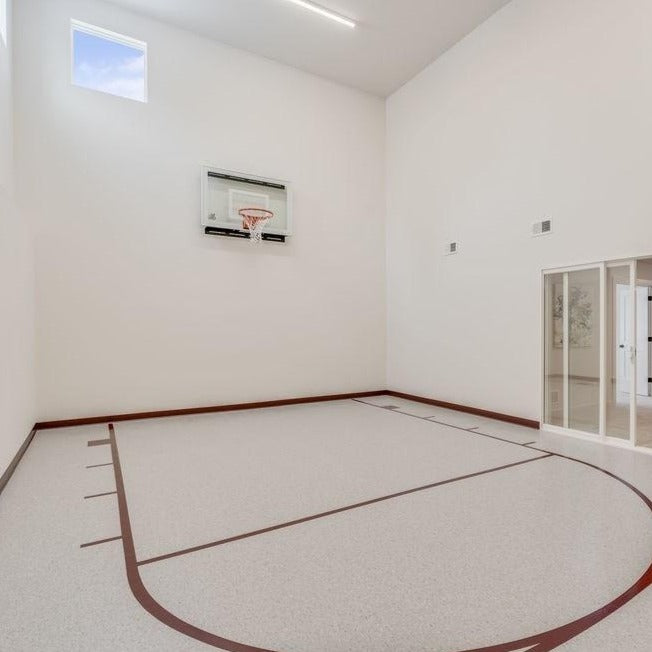
Half courts, barn gyms, and home courts under 40 feet deep. The 6-inch mount gives back the floor a long arm would take.
Shooting stations
Multiple fixed rims along one wall turn a gym into a rep machine for camps, clinics, and team shootarounds.
Schools & rec centers
One height, no crank, nothing to adjust or lock. The right call for gyms where the rim stays at 10 feet, season after season.
Good to know
Fixed-height questions, answered.
Can I change the rim height later?
No - that's the point of this model. The two wall plates set the rim at one height and it stays there, with no crank, linkage, or lock to maintain. Most installs put the rim at regulation 10 feet. If you'd rather be able to drop it for younger players, the adjustable wall mount is the one to look at.
Does it work as a side hoop next to a main court?
That's its best job. With the board only 6 inches off the wall, side hoops stay out of the main court's sideline run-off, and the rims line up for cross-court games. A typical full-size gym runs six along the two long walls; a smaller gym often runs two or four.
Which backboard size should I pick?
72" is the regulation size for a main court. For side hoops, shooting stations, and small courts, 54" or 60" saves wall width and cost without changing the rim or the glass thickness. All three are 3/8" tempered glass with the same triple-spring breakaway rim.
What does the wall need?
Solid backing behind both wall plates - one zone above the board and one below it. The wall backing guide further down this page walks through wood-stud, concrete, and block walls, with the exact heights for each board size.
Is it the same rim and glass as the adjustable?
Yes. Same 3/8" clear-view tempered glass, same heavy-duty triple-spring side-flex rim, same 18-8 stainless hardware. The frame is 5-gauge galvanized steel with a black powder-coat finish.
How close to the wall will players be?
Close - the backboard is only 6 inches off the wall, which is what makes the footprint so small. For any court where players drive to the rim, plan on wall padding behind the hoop; it's standard practice on gym side hoops for exactly this reason.
Interactive guide Not sure which hoop? Let us size it. Two measurements. One recommendation. Tap to open.
Your Setup
Width of wall hoop is mounting to 24 ft
The full width of the wall the hoop mounts to. This sets your backboard size.Room length off the hoop wall 30 ft
How far the room runs out from the hoop — the length of the adjacent wall. This is your playing depth.Where's it going?
The level of play shapes the backboard we recommend.Built to last
Forged from stainless steel.
Every bolt, bracket, and fastener on a Gladiator hoop is 100% stainless steel — an alloy engineered to stay strong, stay clean, and hold its finish for the life of the court.

Corrosion resistant
A self-healing chromium-oxide layer keeps rust from ever taking hold — no orange streaks, no pitting, no rust bleed onto your wall or floor.
High tensile strength
Holds torque and shrugs off the repeated shock of dunks and rim loads without fatigue — the hardware keeps its grip long after the game.
Sleek, premium finish
A clean satin-steel look that reads professional in any gym — the polished surface holds its shine instead of dulling, chipping, or flaking.
Zero maintenance
No painting, no sealing, no rust treatment — ever. A quick wipe is all it takes. Bolts back out clean years later without seizing or stripping.
Hygienic & non-porous
A sealed surface gives dirt, sweat, and bacteria nowhere to hide — ideal for schools, gyms, and any high-traffic indoor court.
The breakaway rim
See the rim do its job
Hang on it. Dunk through it. The triple-spring side-flex rim deflects under load and snaps back to true — protecting the tempered glass and your wrists on every finish.
Real courts. Real installs.
The Wall of Fame
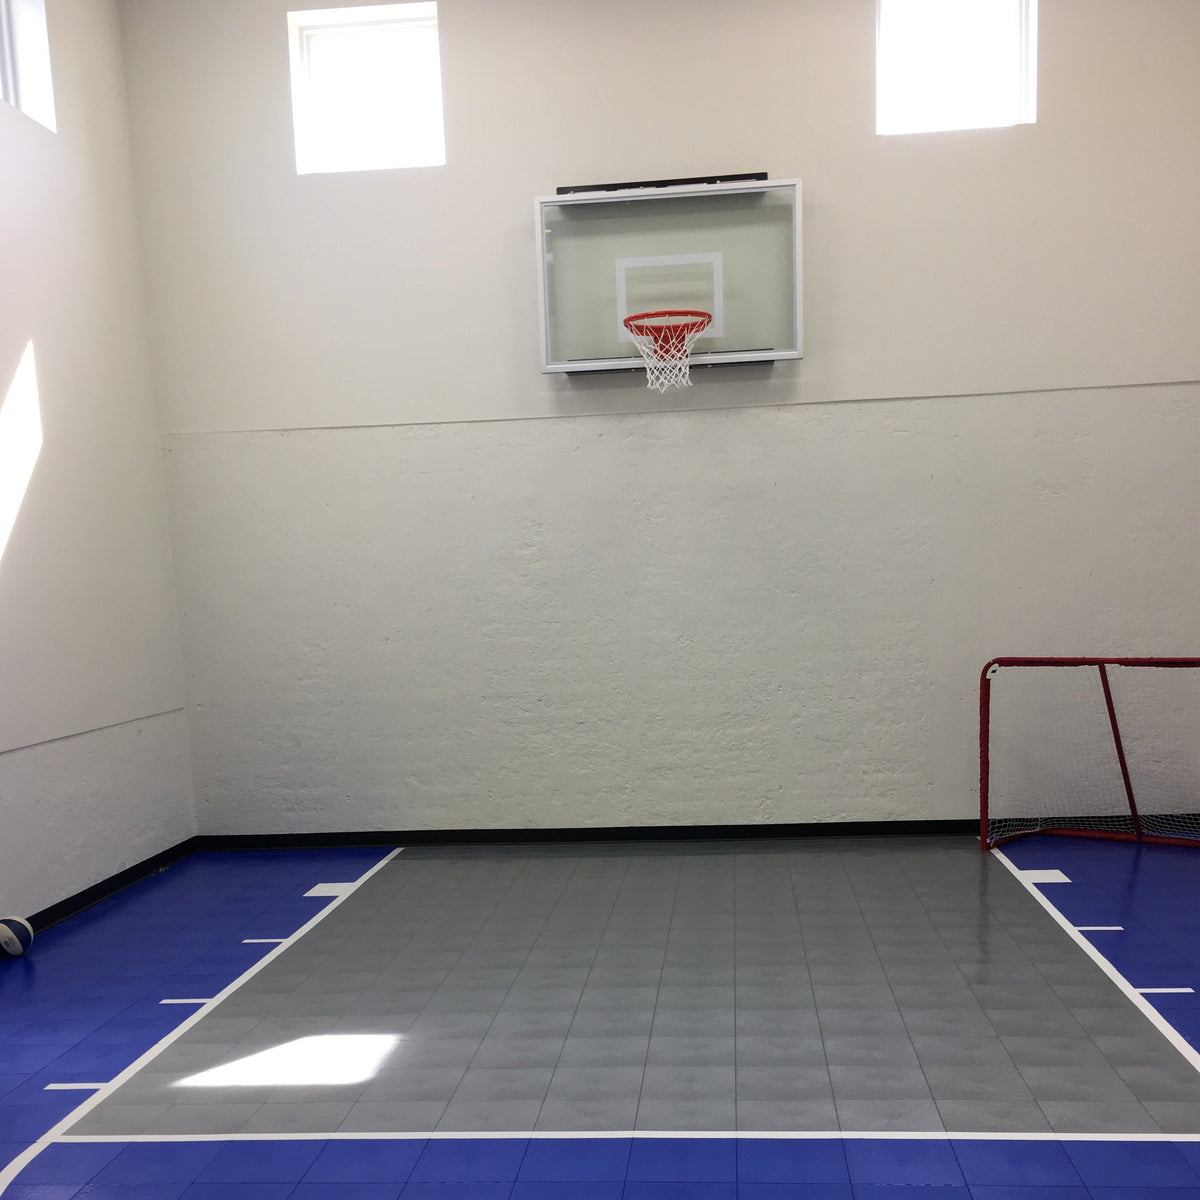
Gladiator fixed-height wall mounts, tight to the wall in real indoor courts. Tap any photo to see it full size.
The wall-mount lineup
Which wall mount is right for the wall?
Five ways to hang a Gladiator on the wall, all with the same triple-spring breakaway rim. The difference is how far the board sits off the wall - and whether the rim moves, by crank or by button.
| Spec | Fixed heightThis hoop | Slide mount | Adjustable, 18" arm | Adjustable, 36" arm | Battery powered |
|---|---|---|---|---|---|
| Overhang | 6 in. | 24 or 36 in. - slides to either | 18 in. | 36 in. | 36 in. |
| Rim height | Set once at install - usually 10 ft | Fixed at regulation 10 ft | Cranks 8 to 10 ft | Cranks 6 to 10 ft | Push-button, 6 to 10 ft in about 31 seconds |
| Best for | Side hoops, small courts, gyms that stay at regulation | Gyms, schools, and home courts that stay at 10 ft but want the board out off the wall | Main hoops where space is tight but the rim needs to move | Main hoops for mixed ages and the youngest players | Main hoops where kids and adults share the rim - no crank to fight |
| Moving parts | None - two fixed wall plates | Slide mount - set at 24" or 36" | Crank linkage | Crank linkage | Battery-powered actuator with wireless remote |
| Backboard | 54", 60", or 72" - 3/8" tempered glass | 60" or 72" - 1/4" tempered glass | 54", 60", or 72" - 3/8" tempered glass | 54", 60", or 72" - 3/8" tempered glass | 60" or 72" - 3/8" tempered glass |
| Weight | 54" - 189.2 lbs 60" - 195.8 lbs 72" - 222.2 lbs | 60" - 175.3 lbs 72" - 199.6 lbs | 54" - 209.0 lbs 60" - 235.4 lbs 72" - 268.5 lbs | 54" - 220.8 lbs 60" - 227.2 lbs 72" - 304.8 lbs | 60" - 247.1 lbs 72" - 324.7 lbs |
| Wall backing | Two zones - above and below the board | Per the slide-mount install manual - call us with questions | One zone, 88" to 120" | One zone, 88" to 120" | One zone, 88" to 120" |
| See it | You're on it | View hoop | View hoop | View hoop | View hoop |
Fixed height
This hoop- Overhang
- 6 in.
- Rim height
- Set once at install - usually 10 ft
- Best for
- Side hoops, small courts, gyms that stay at regulation
- Moving parts
- None - two fixed wall plates
- Backboard
- 54", 60", or 72" - 3/8" tempered glass
- Weight
- 54" - 189.2 lbs
60" - 195.8 lbs
72" - 222.2 lbs - Wall backing
- Two zones - above and below the board
Slide mount
- Overhang
- 24 or 36 in. - slides to either
- Rim height
- Fixed at regulation 10 ft
- Best for
- Gyms, schools, and home courts that stay at 10 ft but want the board out off the wall
- Moving parts
- Slide mount - set at 24" or 36"
- Backboard
- 60" or 72" - 1/4" tempered glass
- Weight
- 60" - 175.3 lbs
72" - 199.6 lbs - Wall backing
- Per the slide-mount install manual - call us with questions
Adjustable, 18" arm
- Overhang
- 18 in.
- Rim height
- Cranks 8 to 10 ft
- Best for
- Main hoops where space is tight but the rim needs to move
- Moving parts
- Crank linkage
- Backboard
- 54", 60", or 72" - 3/8" tempered glass
- Weight
- 54" - 209.0 lbs
60" - 235.4 lbs
72" - 268.5 lbs - Wall backing
- One zone, 88" to 120"
Adjustable, 36" arm
- Overhang
- 36 in.
- Rim height
- Cranks 6 to 10 ft
- Best for
- Main hoops for mixed ages and the youngest players
- Moving parts
- Crank linkage
- Backboard
- 54", 60", or 72" - 3/8" tempered glass
- Weight
- 54" - 220.8 lbs
60" - 227.2 lbs
72" - 304.8 lbs - Wall backing
- One zone, 88" to 120"
Battery powered
- Overhang
- 36 in.
- Rim height
- Push-button, 6 to 10 ft in about 31 seconds
- Best for
- Main hoops where kids and adults share the rim - no crank to fight
- Moving parts
- Battery-powered actuator with wireless remote
- Backboard
- 60" or 72" - 3/8" tempered glass
- Weight
- 60" - 247.1 lbs
72" - 324.7 lbs - Wall backing
- One zone, 88" to 120"
Weights are per-unit net by backboard size - backboard, rim, and all mounting components. No packaging or pallet.
Wall Backing Requirements
The fixed-height wall mount hangs on two steel plates — one above the backboard, one below it. Both need solid backing behind them before the hoop goes up. Pick your backboard size and your wall type.
Do not install this hoop until proper backing is in the wall. Failure to follow these instructions may result in property damage, serious injury or possibly death. If anything here is unclear, call Gladiator Hoops or consult a structural engineer.
Option 1 — LVL Inside The Wall
Standard install · wood studsThe cleanest option. LVL goes between the studs before the sheetrock and disappears when the wall is finished. Already sheetrocked? Cut the rock out, add the backing, patch it back in.
- Mark the wall center first. Find the center of the wall the hoop is going on and mark where the floor meets the wall. Every height below measures up from that mark.
- Upper zone — 11'9" to 12'9" off the floor. For 54" and 60" backboards. Measure up to the first mark, then 12" higher for the second.
- Lower zone — 8'8" to 9'8" off the floor. Identical on 54", 60" and 72" boards. Fill that entire cavity.
- 12" wide LVL. Laminated veneer lumber, cut to length and run horizontally inside the stud cavities.
- 3" thick minimum. Backing fills the stud cavity front to back. Stack LVL if a single board doesn't get there.
- Secure to the studs with 6" deck screws.
- 4 ft minimum width. The wall plates are 4 ft long — back at least 2 ft either side of your center mark. Depending on where the stud cavities fall you may need to go wider.
- Wood studs only. Metal-stud walls need a structural engineer before anything gets installed.
Option 2 — LVL Outside The Wall
Standard install · wood studsRoom already finished and nothing behind the sheetrock? Run the LVL on the face of the wall instead — deck screws straight through the rock and into the wood studs.
- Mark the wall center first. Center of the wall, marked where the floor meets the wall. All heights measure up from there.
- Upper zone — 11'9" to 12'9" off the floor. For 54" and 60" backboards.
- Lower zone — 8'8" to 9'8" off the floor. Same on every board size.
- 12" wide LVL, horizontal. One continuous run per zone — don't piece boards end to end behind a plate.
- 3" thick minimum. Stack LVL to depth if you need to.
- 6" deck screws through the sheetrock into the studs. Hit every stud the backing crosses.
- 4 ft minimum width per zone — 2 ft either side of the center mark.
- Allow for the stand-off. Surface backing pushes the backboard out from the wall by the thickness of the LVL. Check your overhang before you commit.
Solid Concrete Wall
Standard install — if 8" solidEight inches of solid concrete needs no wood backing at all. The plates anchor straight to the wall.
- 8" thick, poured solid. No voids, no hollow cores. Under 8", or not filled solid, and this install is off the table.
- No LVL required. Skip the backing entirely.
- 1/2" x 4" concrete anchors into pre-drilled holes — 6 per plate, 12 total.
- Plate heights don't change. Upper plate top at 12'3" off the floor; lower plate lands under the backboard between 8'8" and 9'8".
- Concrete stops short? Add proper wood backing above it to reach the upper zone.
Block, Brick, Thin Concrete, Metal Studs
Not recommendedGladiator does not recommend installing this hoop into brick, cinder block, concrete under 8" thick, or concrete walls that aren't filled solid.
- Brick and cinder block — not recommended. Hollow cores and brittle mortar can't be verified from the surface, and anchor pull-out is unpredictable.
- Concrete under 8", or not solid-filled — not recommended.
- Metal studs — engineer first. Consult a structural engineer before installing any portion of this product on a metal-stud wall.
- If it's the only wall you have, a structural engineer has to specify the mounting method — and it still has to carry the full load of the board, rim and play.
Questions about your wall? Call us at 651-269-5950 — send a photo of your wall and we'll help you spec it.